Table of Contents
Managing Site Preferences
If you are the Site Administrator you will see an additional tab on the side bar of Direct labeled “Manage”.
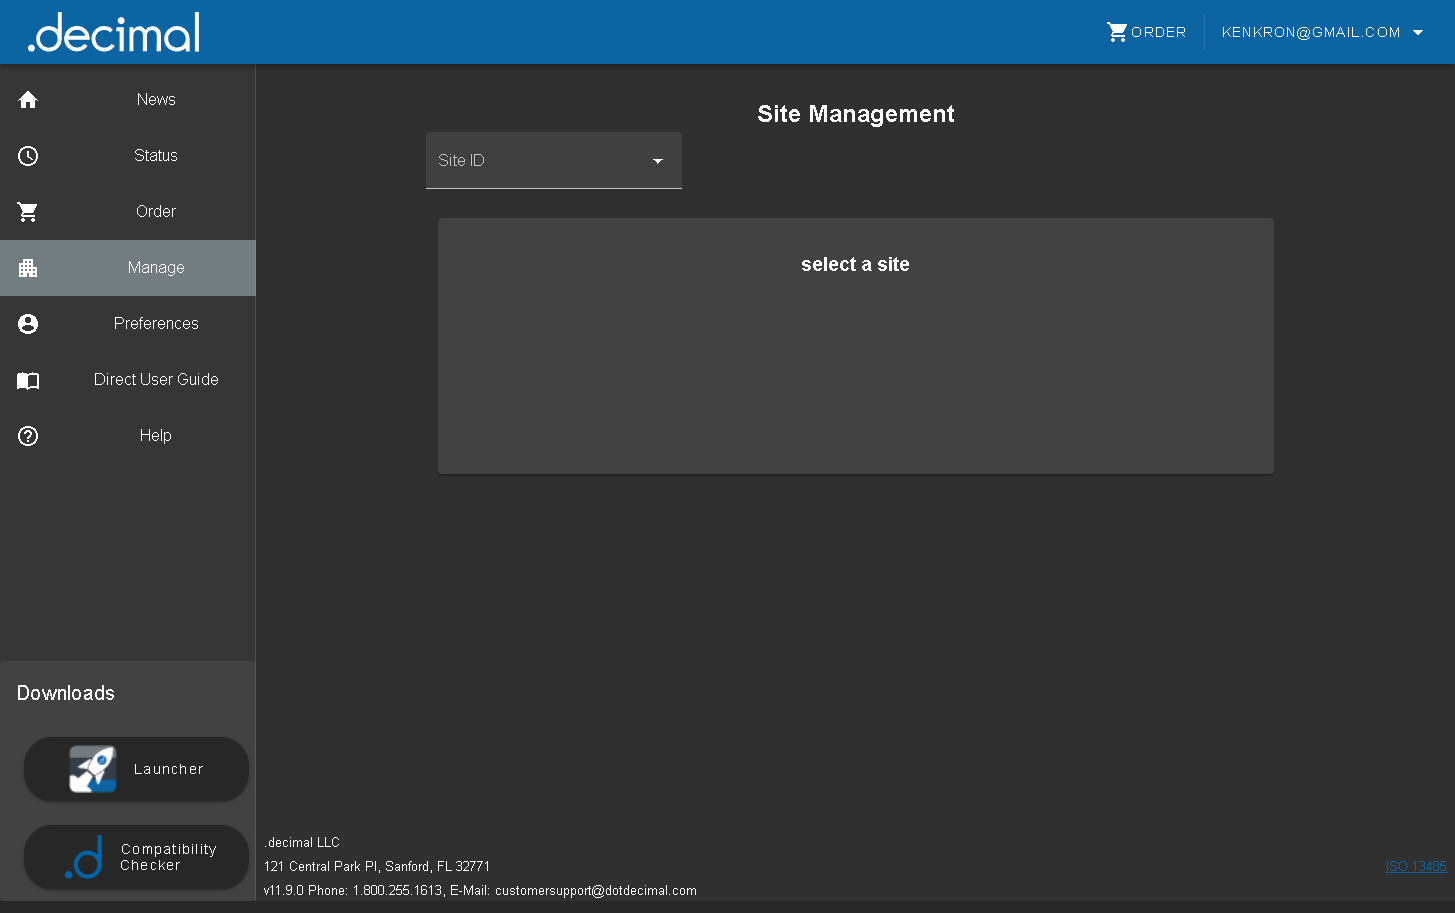
This page allows you a few options for managing your site that would previously require the assistance of .decimal support staff. .decimal recommends that a Site Administrator review all account settings and user accounts periodically (at least annually) to ensure data remains accurate and users are limited only to those staff members that require access.
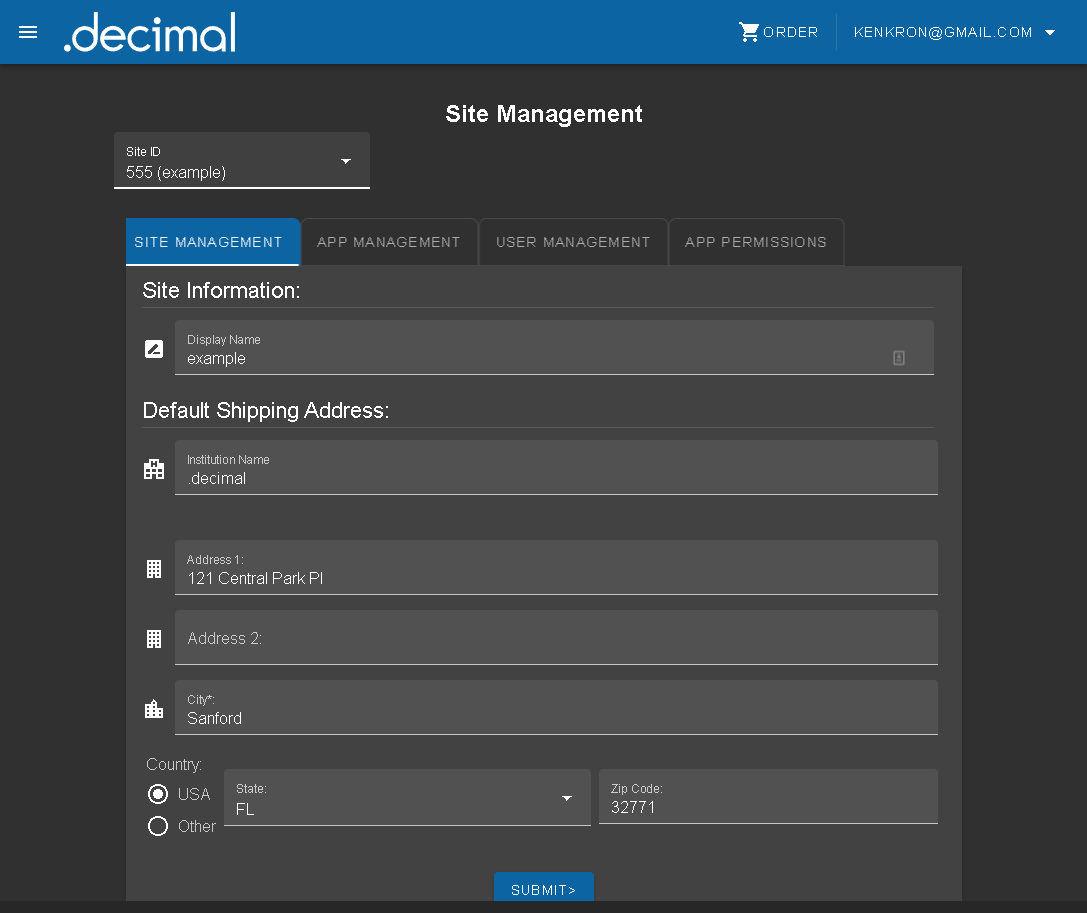
Changing Site Information
Once you select your site from the dropdown, you will see a list the display name and default shipping information for your site. The display name will change how the site is shown on direct.
Changing Application Versions
Once you select your site from the dropdown, you will see a list of all the applications available for that site. You will be able to see your currently selected version of each app and be able to update it using the drop down.
NOTE: Updating this value makes the change for all users in your site. The next time they launch the app through the .decimal Launcher it will download the selected version for them.
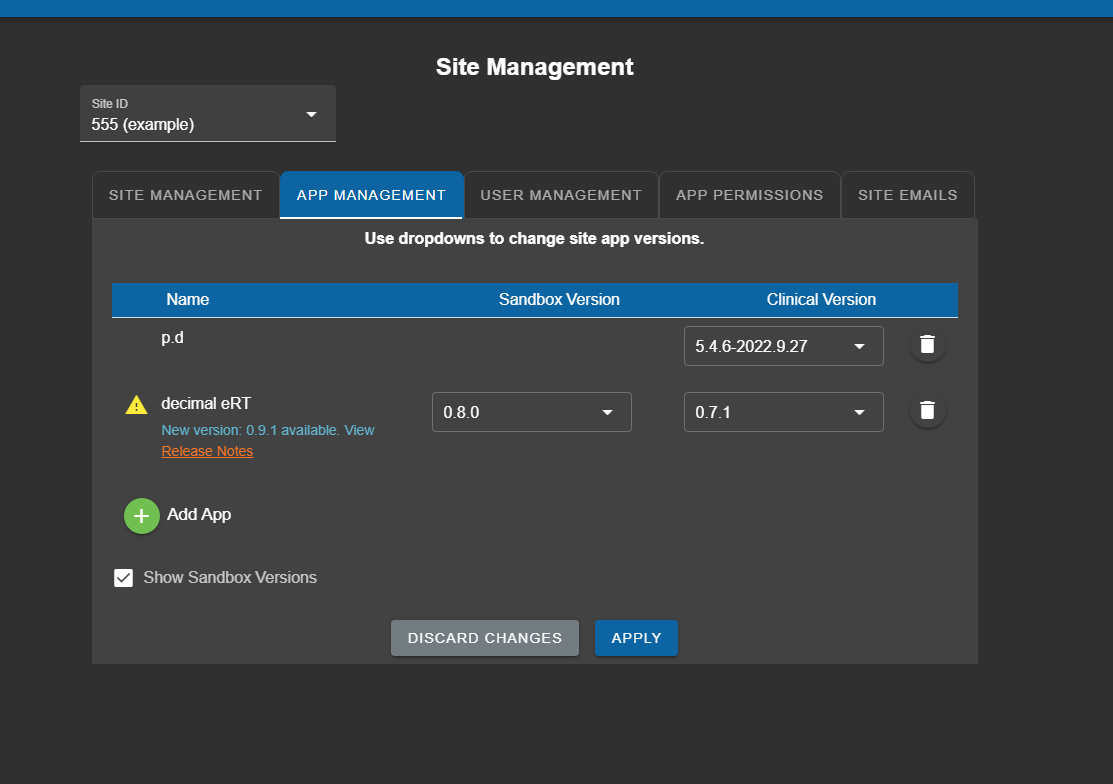
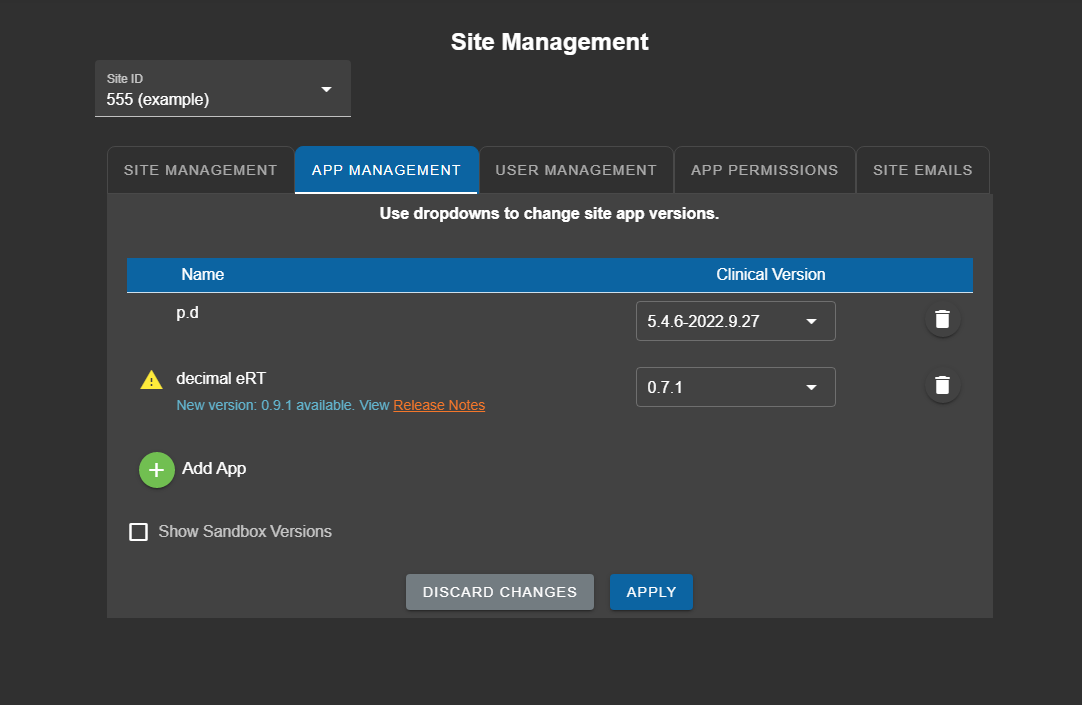 Fig. 3: Manage Apps Without Sandbox mode
If you wish to use sandbox versions for your apps, you must select the “Show Sandbox Versions” check box. Doing so will display a similar list of apps and versions for the sandbox environment.
NOTE: Updating this value functions the same as the clinical version, as described above.
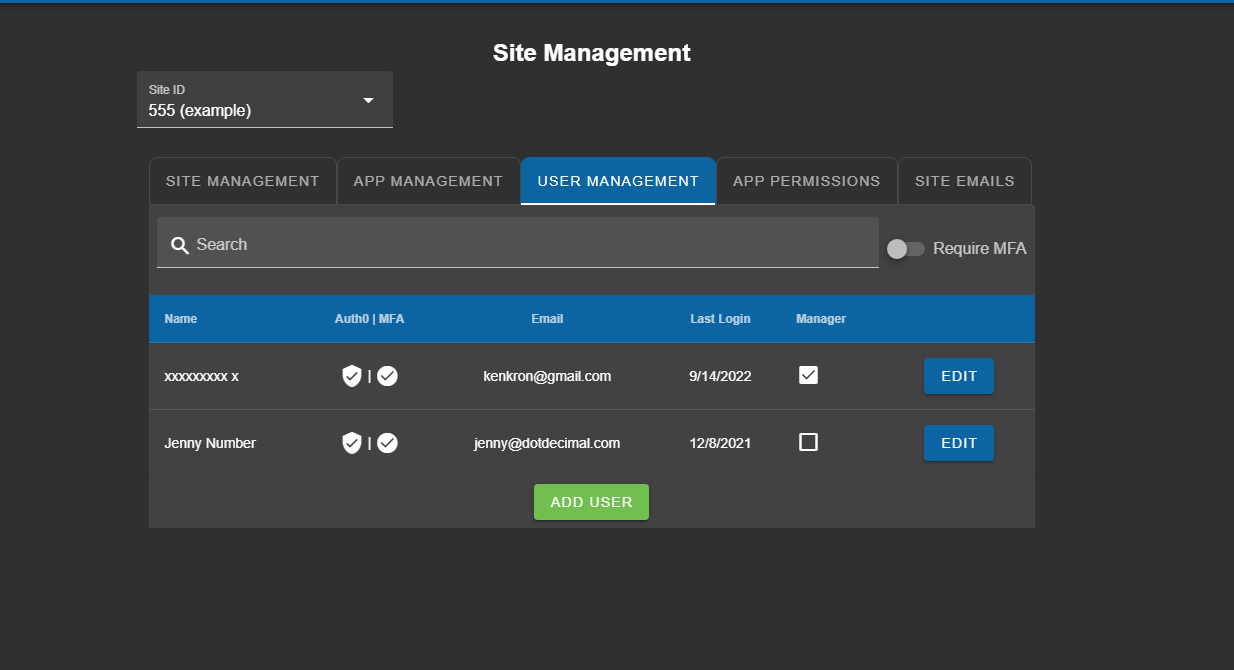
Managing users on your site
If you select the “Users” tab on this page you will be taken to the user list for this site. The users information is displayed, along with a checkmark or x in a circle indicating whether they have multifactor authentication enabled. Here you can see, edit, add, and remove users for the selected site. If extra security is necessary, the “Require MFA” switch may be enabled, requiring all members of the site to log in with Multi-Factor Authentication.
Inviting users to your site
In order to add a new user to your site simply hit the “ADD USER” button and you will be prompted to enter the email of the user you wish to add. If the user is an existing decimal User then they will simply be added to your site along with any sites they currently belong too.
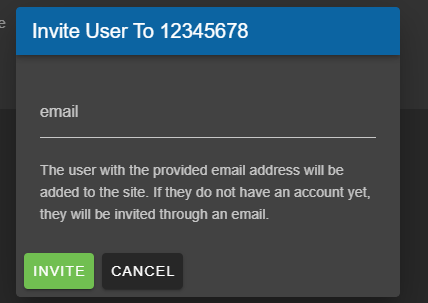
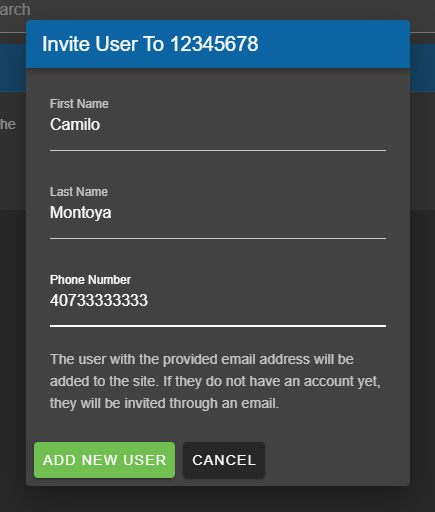
If the email that has been entered does not belong to an existing decimal user a new one will need to be created before being added to your site. Direct will prompt you to enter the following fields for the new user:
- First Name
- Last Name
- Phone Number
These fields are required for all new users and you will be unable to continue adding the new user until they are filled out.
NOTE: Site managers should only invite and add users to their .decimal site for employees of their treatment facility that intended to use .decimal software. This limits the number of user that potentially have access to order history data and .decimal applications that may contain patient data. Abusing the user invitation system is a violation of the .decimal Terms of Service and could result in account suspension.
Newly invited users will be sent an invitation email. If the email needs to be resent for any reason, the invitation can be reset from the edit user dialog. If users are not receiving the email invitation:
- Ensure the email address for the user is correct
- Ensure the email is not being sent to the user's spam folder
- Refer to the Site Management Troubleshooting guide for users not receiving decimal direct email invitations
Editing existing users in your site
You can also use this page to manage your existing users, for example if you wish to update the user information for any of your users you can simply select the “Edit” option for that user. You will see the fields you are available to update for this user displayed, and when you are finished updating the user simply “save” your changes and you will be taken back to the manage page.
User Permission Levels
You can also edit the permissions granted to this user from the following options:
- Elevated:The highest level of user permissions, generally allows for managing machines, site configurations, access to sandbox versions, plan approvals etc…
- General: The lowest level and most commonly used of the user permissions allows for standard usage of .decimal applications.
More app specific definitions of what these permissions mean can be found in the application's help documents:
- p.d: Refer to the local p.d client user guide installed with your application.
- decimal Electron RT: ElectronRT user guide
- decimal Launcher: Launcher user guide
- decimal3D: decimal3D user guide
NOTE: Users can only have one level of permission granted to them at one time.
Newly invited users will be sent an invitation email. If the email needs to be resent for any reason, the invitation can be reset from the edit user dialog.
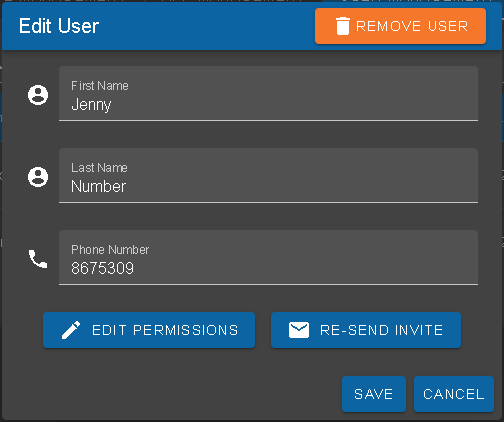

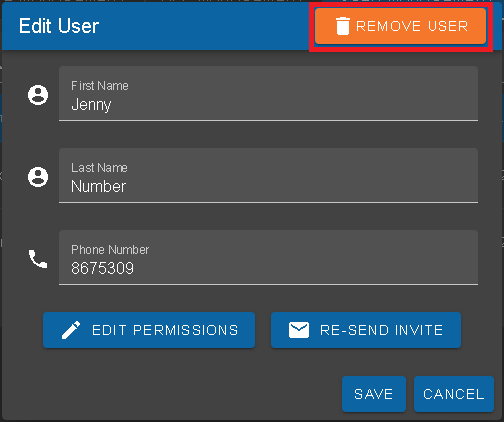
Removing users from your site
Additionally if you no longer wish to have a particular user in this site selecting the “Remove User” option when editing will remove that user from the site.
NOTE: You are unable to remove site owners, you must demote them to a normal user first. Also this will NOT affect any of the user's other sites or remove them as a decimal user they will simply no longer be a part of your site.
Promoting/demoting site managers
Finally, you are also able to promote other users to be site owners and they will be granted all the same rights to manage apps, invite/edit users, and any other permission tied to site ownership. As a site owner all you have to do to promote another user is to check the “Manager” checkbox by that user's name.
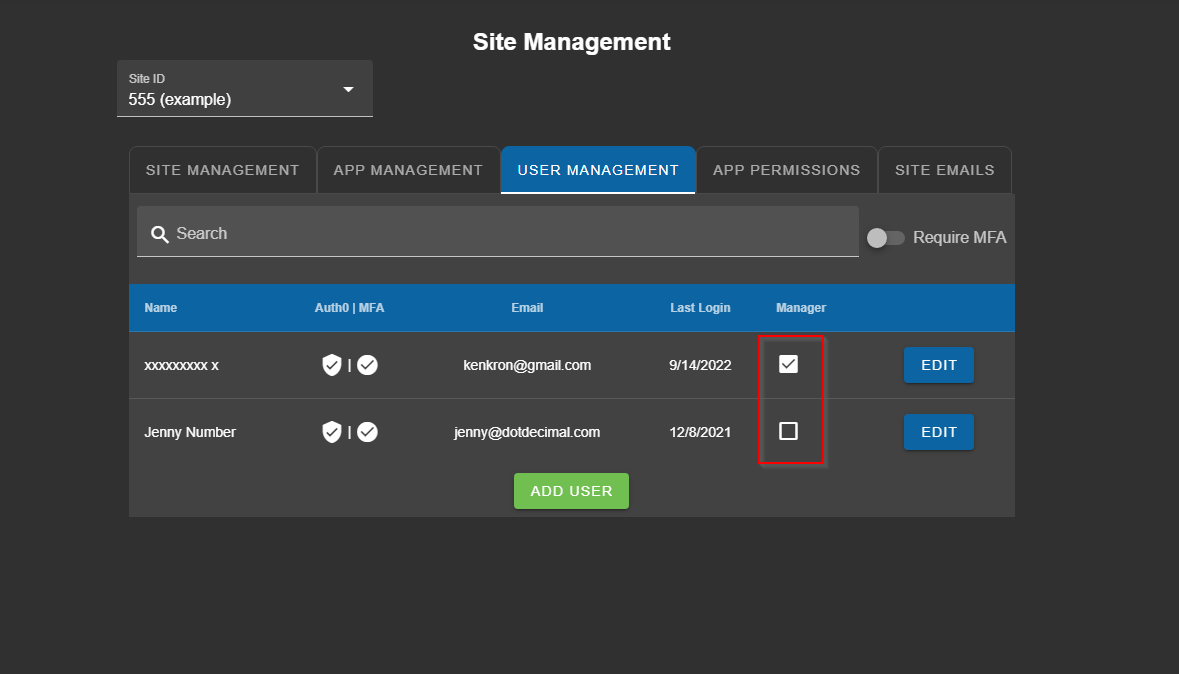
Direct will provide you with a confirmation message and once that is approved that user will be a site owner as well. If you wish to demote a site owner you just simply un-check the box and confirm the removal of this user's owner rights.
NOTE: You may not demote the last remaining owner this way.
App Specific Permissions
Some .decimal applications have permissions that can be changed, either site wide for all users, or on a single user-by-user basis. These permissions can be seen in the “App Permissions” tab. Site wide permissions are shown at the top, and user permissions are underneath. Clicking on a user will show or hide the permissions applied to them. The checkbox to the right indicates whether a permission is enabled. Permissions noted as “*managed by .decimal” can not be changed by users and must be changed by .decimal staff (e.g.: this is a separate purchased license).
The .decimal Applications with app specific permissions include:
- p.d:
- For p.d's available application permissions please refer to the p.d user guide installed with your p.d software for your specific version of p.d. Note: the available permissions are also dependent on the application version of p.d you are using.
- decimal eRT:
- eRT's application permissions can be found on the Account Permissions user guide page. Note: the available permissions are also dependent on the application version of decimal eRT you are using.
An example of the application permissions are shown below (note, these permissions may differ from what you see in Direct and have available in your local version of your applications).

To modify the permissions, click the edit button. This will allow the permission boxes to be checked and unchecked, with the exception of permissions managed by .decimal. Remember to click “Save” when your changes are complete, or “Cancel” to discard them.
Site Wide Email Notifications
While each individual user can manage their own email notification settings as described in the section above, as a site manager you can also control a secondary list of email addresses to receive notifications regardless of which user in your site orders a part.

As stated a user's personal email settings still apply regardless of what is listed here when they order a part. Meaning, if the Site Emails list is empty but they choose to receive email notifications when their part ships then they will still receive their desired email.
If you wish to edit this list simply press the “Edit” button and this will open the editing interface.
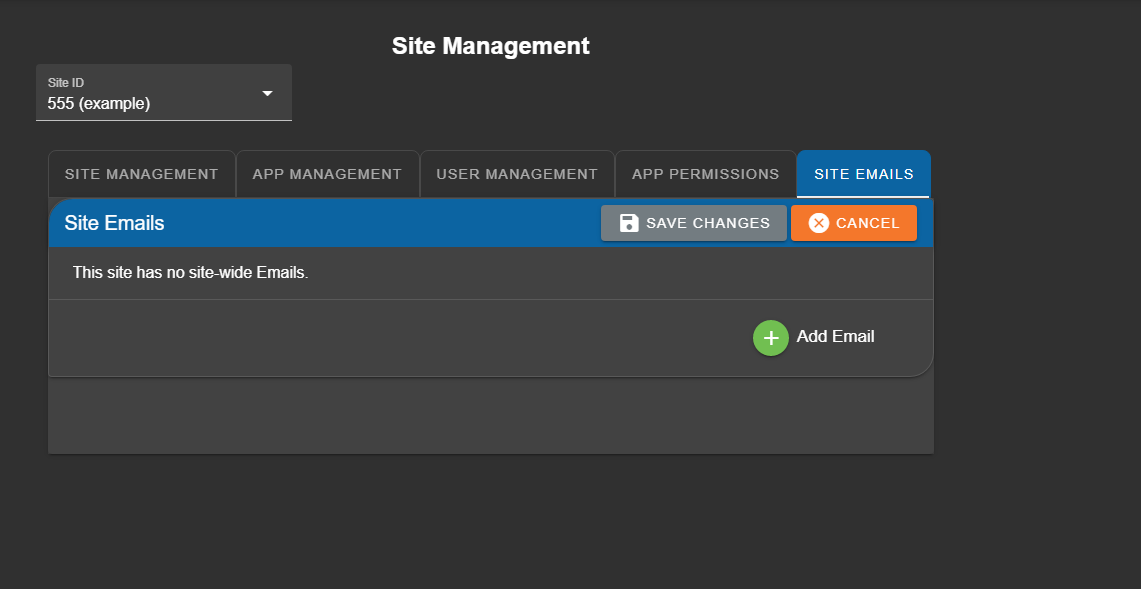 Fig. 14: Editing Site Wide Emails
Pressing the plus icon labeled “Add Email” will allow you to add any number of emails to this list. When adding a new email to the list you will see the following:
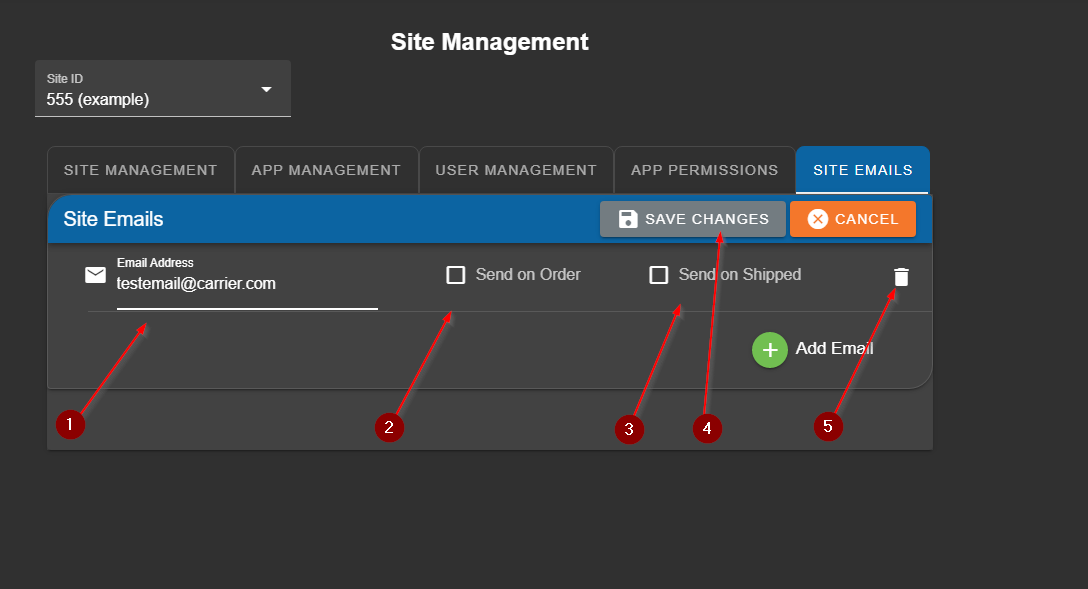
- Email Address textbox: where you can enter the email address you will be adding
- “Send on Order” Check box: If checked this email address will receive a notification when any user in your site submits an order for a part.
- “Send on Shipped” Check box: If checked this email address will receive a notification when a part that was ordered by a user in your site gets shipped from our facility
- “Save changes” button: Saves all the emails and their settings then disables the editing interface.
- “Delete” icon: Removes this email from the list