Table of Contents
Walkthroughs
Overview and Purpose
These walkthroughs are intended to be easy to follow step-by-step guides for creating plans using Astroid. There is a simple prostate patient, which is then followed by a complex head and neck plan. In many cases specific prescription, constraint, and other dosimetric values are given to use as input. It should be noted that these values are not intended to provide clinical guidelines and should in no way be considered a recommendation for values that are appropriate for clinical use. The intent is that after completing these walkthroughs, you will have gained an understanding of many of the details and much of the information that will be required to generate a complete Astroid treatment plan. Armed with this information and knowledge, you will then be able to complete the process using the clinical protocols and requirements from your facility to generate clinically appropriate patient treatment plans using Astroid. Additionally, since many of these parameters and items are dependent upon one another to produce high quality treatment plans, it is recommended that you follow along exactly in order to produce similar results. Once you have gained comfort and understanding of the various planning parameters, then it is encouraged that you modify the parameters and explore their impacts to gain additional familiarity with the system.
Prostate Plan Walkthrough
Launching Planning
- Open the Astroid Launcher and login
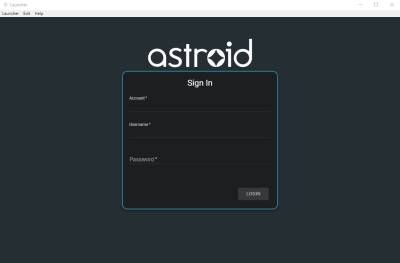
- Select your realm
- A list of available apps will be listed on the left, select Planning from this list
- If you see an Install button click it and wait for the version to install. You will know it is installed when you see a LAUNCH button
- Click the LAUNCH button. The version of planning that is installed in your realm will now open
Creating a Patient
- From within the Planning App click on the Imports block
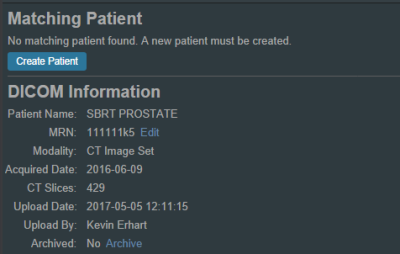
- Select the CT image set (SBRT Prostate) from the list of available files for import
- Ensure that the MRN is correct
- In the control pane on the left hand side, the patient model will be automatically selected based on the structure set DICOM UID information
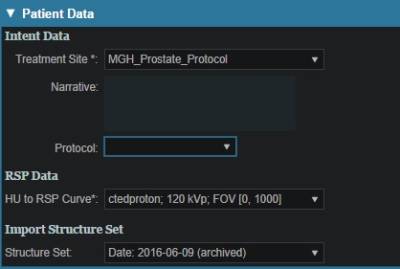
- Fill in the Patient Data and select the appropriate treatment site and HU to RSP curve (as shown below)
- You will see a list of the imported structures. Here you may choose whether or not to import each structure by checking or unchecking the box beside each structure name.
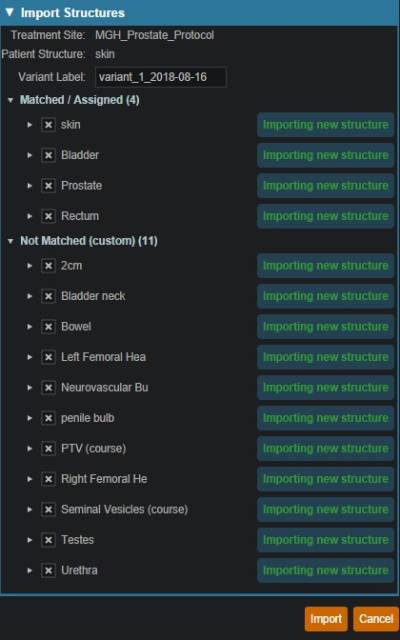
- For this case, we will import all available structures and there is nothing to change on this page
- You also have the ability to assign or edit any structures that are shown as custom, which indicates the name did not exactly match a site structure from the treatment site template list you specified during patient creation
- Matched, Assigned, and Custom structures are designated with corresponding tags at the end of the structure name in the structure list.
- Assigning a custom structure to a defined site structure will result in the imported structure inheriting all the predefined structure properties (e.g. name, type, color)
- For all custom structures the type is by default set to “Other” unless it contains the letters “TV” (as in PTV or CTV), in which case it is assigned the type of “Target”; this may be changed here if needed
- Click the Import button to create the patient and import the CT Images and Structures into it
- The patient is now created and all available data has been imported, so it is time to proceed with entering the prescription information
Course Prescription
Prescription information is stored in the Course and must be added prior to making a treatment plan for a new patient.
- Open the patient after importing the CT and Structure Set
- Open the Patient Course (note: it will automatically open if the patient is freshly created)
- Next proceed to Prescriptions
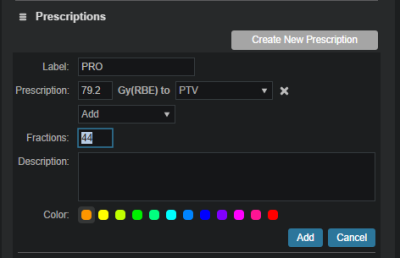
- Select PTV from the Prescription drop down menu
- Label and Description are free text fields that allow you to “name” each Prescription and provide any description or notes necessary to distinguish between each in the case of multiple prescriptions. You must enter a “name” in the Label in order to proceed. You are free to enter your own values in these fields for this walkthrough. Click Add when completed
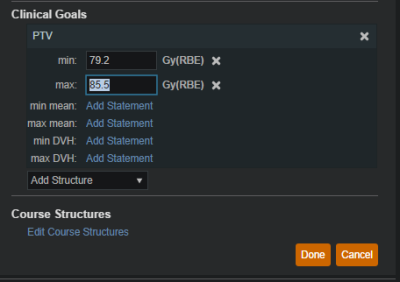
- Fill in the Clinical Goals
- Choose the structure from the dropdown to add your goal
- Click Done to complete the Course editing
Plan Creation
The required Course and Patient Model information was selected during import, so now we can move to creation of a treatment Plan
- From the Patient Overview tree, click Add Plan under the Patient Model entry

- Name the plan and click OK (the description is optional)
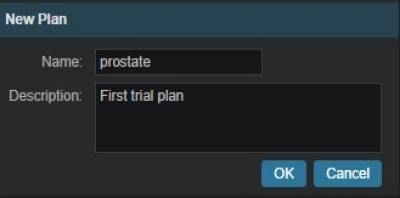
- This creates an empty plan with its prescription set to fulfill all portions of the Course Prescription
- Now open the new plan by clicking the Open button under the new plan entry in the Patient Overview tree
Plan Prescription Implementations
- Click the General / History heading to expand this block
- Notice here that our empty plan starts out with its prescription set to fulfill all portions of the Course Clinical Goals and Prescriptions
- If a plan will only fulfill a portion of the Prescription, then this information should be edited to reflect this, otherwise just proceed past this block
- In this case, we will be fulfilling the entire prescription with a single plan, so no editing is needed
- Generating our plan will now progress to the Patient Geometry block, where we will create any points or planning structures that are needed (if not created in contouring software), such as a combination of the left and right femoral heads (see Structure Geometry for details on how to create structures)
- We will create a new point to use for the isocenter (note this step is done for illustration purposes and is not necessary for most plans)

- Click DONE button at the bottom of the page
HU to RSP
Next we will move on to defining the HU to Proton Relative Stopping Power (RSP) conversion
- Click to open the RSP Image block
- If any density overrides are needed they are entered here in the RSP Image block
- If the HU to RSP curve chosen upon patient import needs to be changed the user may do so at this point
- We do have any density overrides to apply for this case and the proper HU curve has already been selected
- Click the Cancel button to close this block if you have already clicked on the edit button
Calculation Grid
We are now ready to define the dose calculation grid (see Defining the Dose Grid for a detailed explanation)
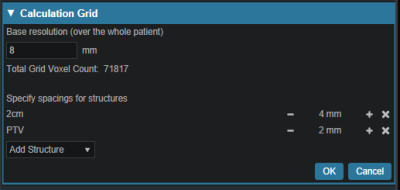
- Click to open the Calculation Grid block
- Click the Edit button
- Create a grid by performing the following steps:
- Set the base grid resolution to 8 mm
- Click on Add Structure drop down menu and select the “2cm” structure then set the size to 4 mm
- The Prostate is included in the PTV volume so there is no need to set a separate grid size
- Click the OK button
Beams
We are now ready to begin defining the treatment beams
- Click to expand the Beams block (see Creating a New Beam for detailed explanation)
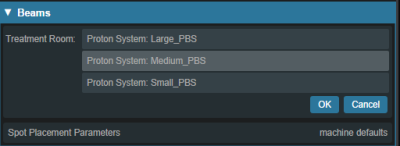
- Before defining individual beams, we will first set some shared beam properties
- Click the OK button
- Click on the Spot Placement sub-block to set the following values (note these are the plan level spot placement parameters, so it will apply to all our beams, unless we specifically override the values within an individual beam)
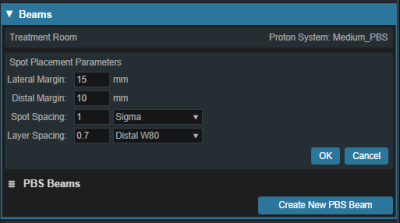
- Lateral margin- 15 mm
- Distal margin- 10 mm
- Spot spacing- 1 sigma
- Layer spacing- 0.8 Distal W80
- Click the OK button
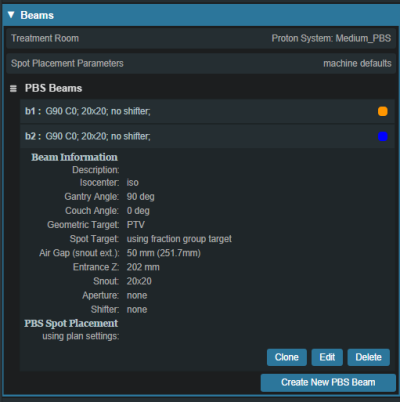
- Now we are ready to make our beams
-
- Enter the following for each beam
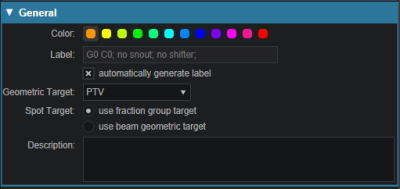
- General
- Select the PTV as the Geometric Target and if desired, enter a description for the beam, for other selections leave the defaults (see Structure Geometry)
- Approach
- At this point the user will specify the geometry of the beam by setting the isocenter as well as the gantry and couch angles
- Two beams at gantry angles of 90 and 270, respectively, will be used here, which is typical (+/- 5 degrees) for standard prostate plans such as this example
- Couch angle of 0 is used here for each beam
- Snout
- Aperture (if desired)
- If there is the need to use an Aperture for sharper penumbra the user can do so at this time (see Creating an Aperture)
- Note that Astroid has the ability to utilize an Aperture with pencil beam scanning for both SFUD and IMPT plans and the aperture construction will be based on the Geometric Target selection
- For this plan, no apertures are necessary
- Shifter
- Simply choose a shifter from the list if one is needed
- Air gap
- The air gap is specified as the distance from the final beamline device (aperture or shifter) or the snout end if no devices are present
- The view automatically shifts to the 3D view when entering this sub-block and you can adjust the air gap to ensure patient collisions are avoided
- The default air gap is sufficient for both beams in this example
- Spot placement
- Since we want both beams to use the same spot settings, we have those at the plan level and there is no need to edit the spot placements here for the beams
- DRR options
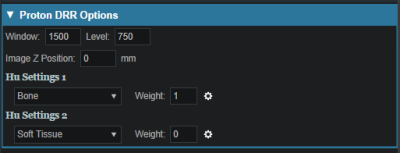
- The Proton DRRs shown in the Beam task are generally used to help determine appropriate treatment angles
- In cases such as these, appropriate angles are readily determined and there is no need to utilize the DRR sub-task
- If you wish to explore this feature however, you may choose one of the preset HU Settings from the drop down or manually set the level, window, min HU and max HU or go into Advanced Options for additional control of the DRR's
- Click Done to complete the first beam
-
- After creating the first beam, at gantry angle 90, it is recommended that you Clone it and simply change new beam's ganry angle to save time in creating the second beam at gantry angle 270 (the Clone button is available under a beam when it is selected for viewing from the list of beams)

-
- Note for more complex plans, there are often additional parameters to change (such as the aperture and the air gap) when creating additional beams via the Clone option
-
Optimization
With the two beams completely defined, we can now move on to organizing our treatment fraction groups and specifying the constraints and objectives for the treatment
- Open the Optimization block (see Astroid Optimization for a detailed explanation of Optimization, Feasibility and Constraints, as well as Running the Optimizer)
Fraction Group
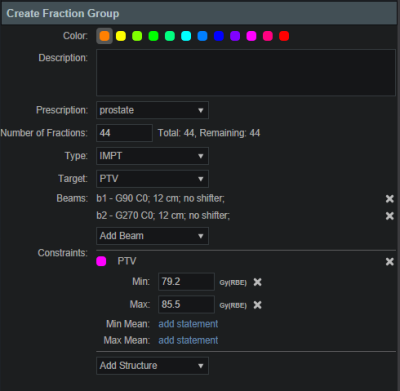
- Choose Create a New Fraction Group under the Fraction Group block (See Fraction Groups for a more detailed explanation)

- In the Prescription drop down, select the Prescription that was created earlier in the Course (“PRO”)
- Enter 44 for the Number of Fractions
- Select IMPT as the Type
- Set the Target to the PTV
- Add both beams that were created above
- Next to Constraints click the Add Structure drop down and choose the PTV
- Add a min dose constraint of 79.2 Gy (1.8 Gy per fx)
- Add a max dose constraint of 85.5 Gy
- Click Done to complete the Fraction Group
Constraints and Feasibility
- Open the Constraints / Feasibility sub-block
- First we will enter the Constraints for the planning (target) volumes and a global maximum constraint
- For this example do the following:
- Click the Edit button
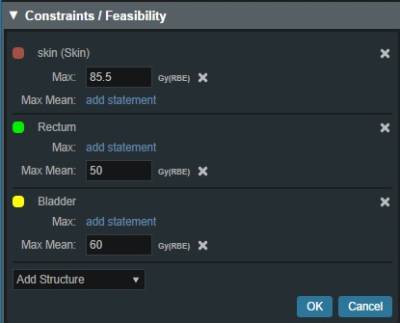
- Click Add Structure and select (Skin)
- Add a max set to 85.5
- Click the OK button
After the target constraints have been entered, it's generally good practice to test the plan feasibility. The Feasibility calculation is run by clicking calculate at the bottom of this block. The Feasibility calculation is based solely on the constraints and it should be used to ensure there is a possible solution (plan) that can meet the specified constraints. Establishing Feasibility is often an iterative process in order to get appropriate constraints established for a particular plan. In other words, the user may need to enter a constraint, check the feasibility, then progressively tighten the constraint and check the feasibility until the plan is no longer feasible. It is recommended practice to start by obtaining a feasible plan utilizing only target constraints (and a global max constraint) then add OAR constraints as desired. Remember, using a narrow range of constraints can improve the optimizer performance and improve the resolution of the Pareto surface navigation.
-
- The feasibility should return as passing, if not, please confirm your plan parameters match those shown throughout this walkthrough and try again
- Now with the target constraints set, we'll continue to add our OAR's
- Again these will be set per department protocol
- For this example create the following OAR constraints:
- Rectum max mean 50 Gy
- Bladder max mean 60 Gy
- Run Feasibility as before
- The feasibility should return as passing again, if not, please confirm your plan parameters match those shown throughout this walkthrough and try again
- If the feasibility has passed click the OK button
Objectives and Optimizer
- With narrow constraints set and feasibility established, we will now turn our attention to Objectives
- Objectives are the goals that you would like to achieve and these will be the driving forces for the Optimizer
- Expand the Objectives / Optimizer sub-block and then click Edit under the Objectives section
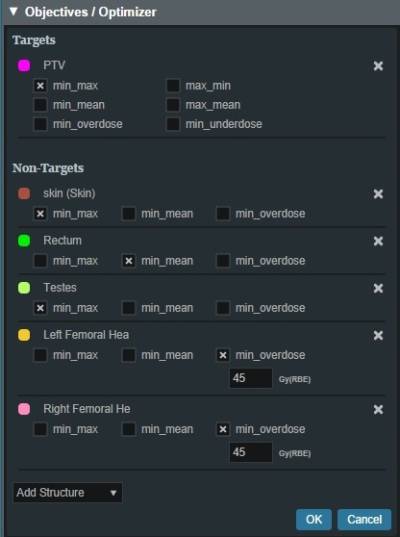
- For this example we will use the following objectives (Click the Add structure drop down menu to add the following)
- The External_Body (Skin) will automatically populate
- Rectum min_mean (Minimize the mean dose to the Rectum)
- Testes min_max (Minimize the maximum dose to the Testes)
- Left & Right Femur min_overdose 45 Gy (Minimize the amount of the structure the receives dose above 45 Gy)
- PTV min_max (Minimize the maximum dose within the PTV)
- Click OK to complete the Objectives
- We are now ready to run the MCO, by clicking the calculate link
- This may take up to 10 minutes for this plan depending upon your available cloud services resources
- Keep in mind that even though this process may take some time, the planner will be able to make adjustments easily in the Navigation without running a new plan
Navigation
- Once the MCO has been completed, you can adjust the relative importance of the objectives using the slider bars in the Navigation block by clicking the Edit button in the Navigation block(see Astroid Optimization Navigating the Solutions for a detailed explanation of using the slider bars)

- Adjust the slider bars in the Navigation block to find what you feel is the optimal plan for this case
- Note: All of these adjustments are made without having to run a new plan
- If you find a plan that you like, but wish to continue exploring further, you can click the Save button to save the current slider state and then continue exploring
- You may return to the last saved state at any time by clicking the Reset button
- The Cancel button will close the navigation block, reverting back to the last Saved state
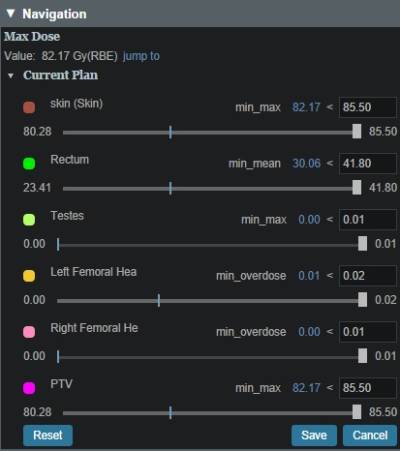
- The plan is ready for physician review at this point
- Physicians often find it useful to Navigate the solution and explore trade-offs in real time, which can often alter the traditional physician approval process into an interactive, real-time trade-off analysis and on the spot plan approval
- After the physician has decided on a treatment plan the user may then proceed to export the chosen plan to the EMR
- Note that these standard (non-plan specific) features are covered in other guides and not repeated herein

