Table of Contents
DICOM Patient Import
In order to begin planning in the decimal ElectronRT App you must first have patient imaging captured and structure geometries defined. This information is brought in the ElectronRT App by importing DICOM CT and Structure Set files.
Note: DICOM patient import will be disabled until the organization configuration has been completed.
Default Import Directory
The default import directory can be set in the app settings by navigating to View → Settings. This directory will always be the default directory when importing a patient. Users can then further refine the import folder as needed starting from this default level.
Importing a New Patient
The ElectronRT application has two methods for importing new DICOM patients: 1) Manually browsing for local files and 2) setting up a DICOM receiver to accept and import DICOM patients. Refer to the sections below for details on each option.
Local File Import
If you have a set of Ct Images and structures you can import them directly into a new patient through the “Import Patients” menu.
 Fig. 1: Import in the Main App Page
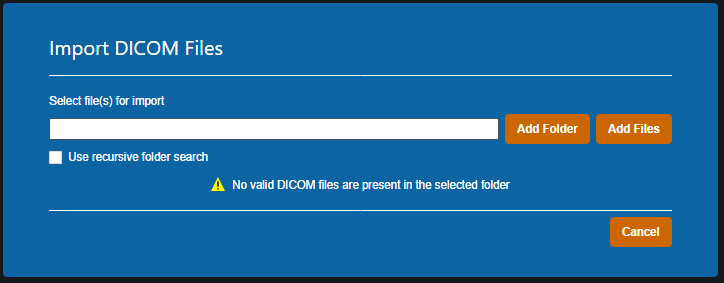 Fig. 2: Import Directory Input
The Import DICOM Files option allows you to either browse your computer or copy the path to the folder that contains the CT images and structures you wish to import. The following options are available for browsing for local files:
- Add Folder: Browse for an entire folder of DICOM files to import into a patient
- Use recursive folder search: This option can be selected prior to adding a folder to reclusively search and add all DICOM files within the selected folder and all sub-folders.
- Add Files: Browse for individual DICOM file(s) to import into a patient. Note: this option does not make use of the recursive folder search option.
A list of selected DICOM files for import will be displayed and you can choose to add more files for the selected patient or remove any files as desired.
Refer to the Processing Imports section once files have been selected to import.
DICOM Receiver Imports
Users can install and configure the ElectronRT DICOM Receiver to receive and save patients for seamless importing into the ElectronRT application.
Users can then specify a DICOM Import Monitoring Directory within the Site Configuration's DICOM Settings block that corresponds to the storage_location field set for the ElectronRT DICOM Receiver. Once the receiver and monitoring directory have been setup and configured, any DICOM patients sent to the ElectronRT DICOM Receiver will automatically show up within the Import Patients display as shown in figure 3.
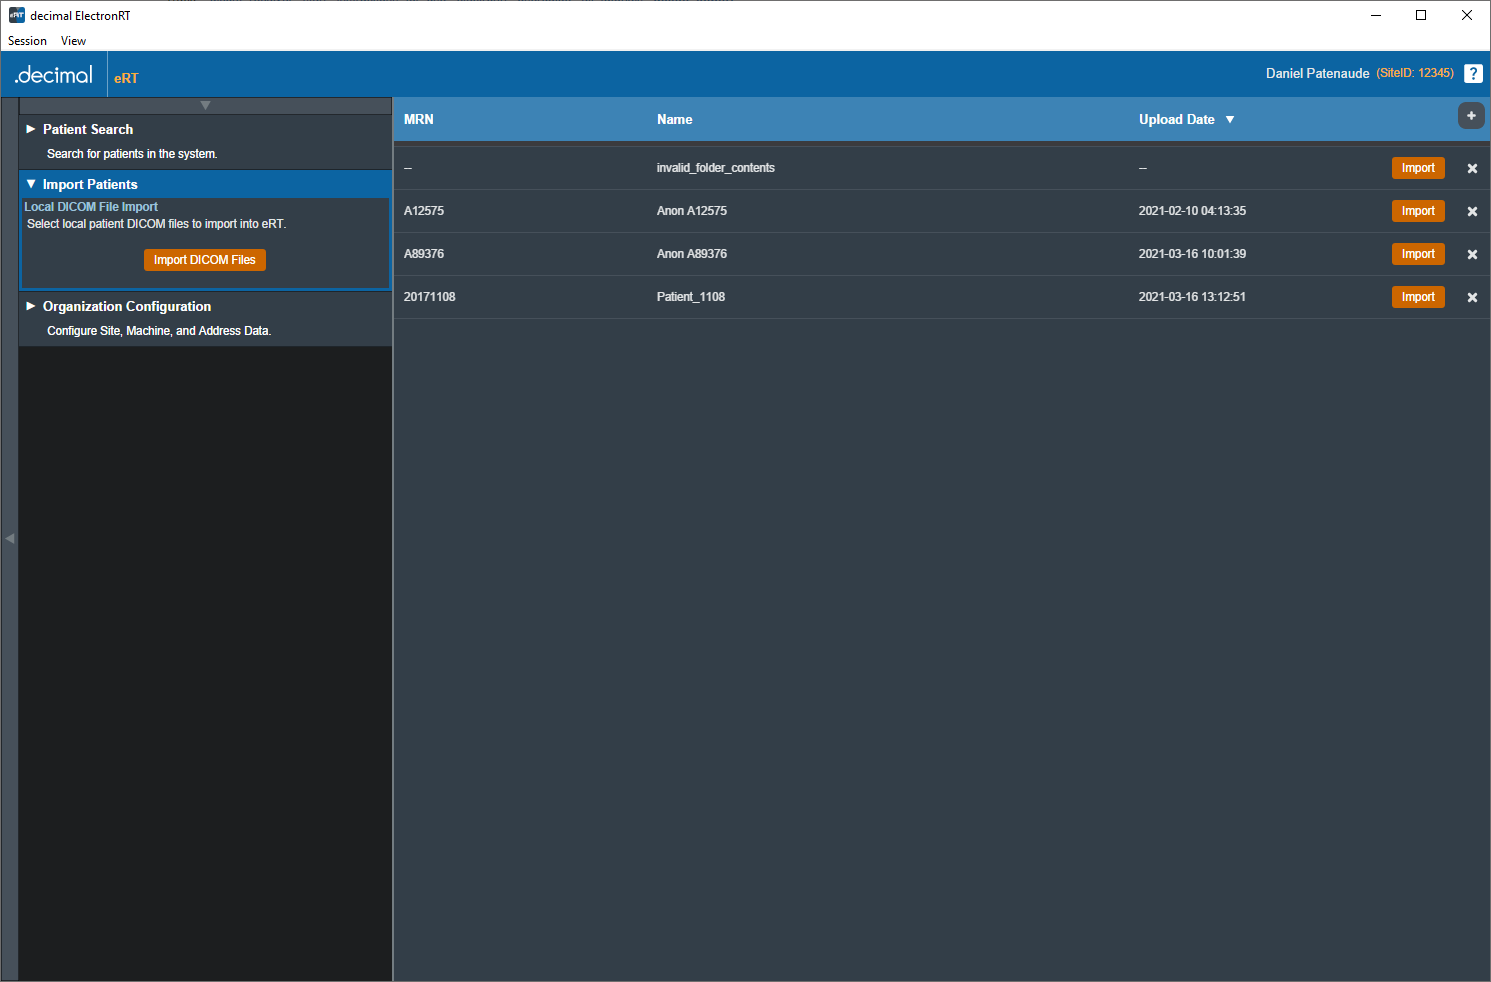 Fig. 3: DICOM Receiver Patients
Each patient received from the ElectronRT DICOM Receiver can be imported or removed from within the eRT Import Patient block.
Refer to the Processing Imports section once a patient has been selected for import.
Processing Imports
Clicking the Import button will start processing the selected files.
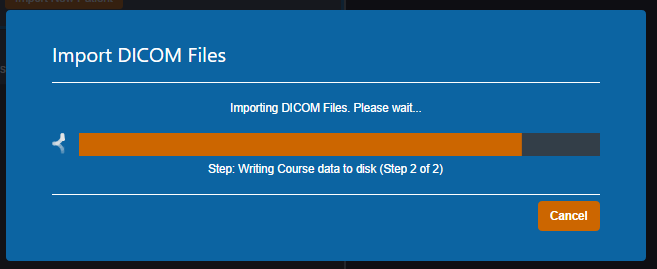
If there are no Errors while importing you will be taken to a confirmation page for your import.
If there are errors, please refer to the Common Errors section below for further details.
Importing DICOM Plans
Users have the option to import DICOM Plan files in addition to CT images and structure sets. For now, only electron plans can be imported into the decimal ElectronRT app. When importing a new patient, the DICOM plan file must have the proper UIDs that reference the structure set in order for the plan to be successfully imported. An imported plan will appear under the course of the new patient and will be marked as imported.
Refer to the Imported Plans section for more information on imported plans.
Common Errors
Missing/Undefined External Structure
If the imported DICOM Structure Set does not have a structure flagged as RT ROI Interpreted Type (3006,00A4) EXTERNAL you will be directed to specify the external patient structure before the import resumes. The patient external structure must be set to the defining boundary of the patient's outer surface, and not a rind skin structure.
Note: You will be warned if the selected external structure is not the structure with the largest volume. This is to prevent incorrect structure selection. For example, when a 'External' and 'Skin' structure both exist, and the 'Skin' structure is a rind, if the user selects the 'Skin' structure, the warning will state the 'External' structure has a larger volume, since that's the correct representation of the patient structure needed for the ElectronRT App.
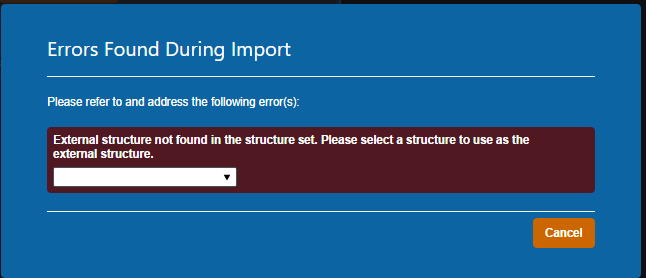 Fig. 6: Missing External Error
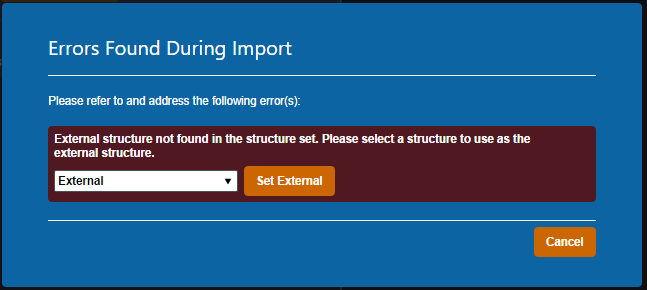
The drop down menu will have a list of the structures in the imported set. You will be able to select one as the external for this course then confirm your choice by pressing “Set External”.
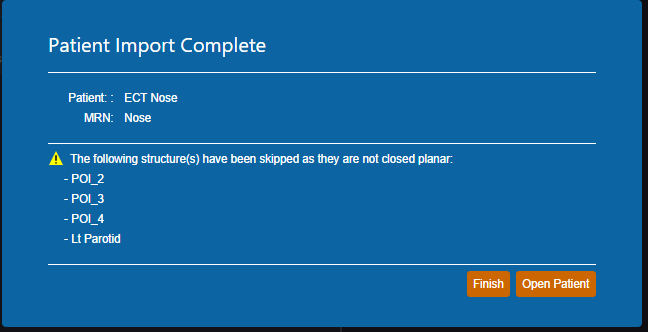
Structures Skipped During Import
Structures can be skipped during Structure Set import if the structures meet the following criteria:
- Non closed planar (e.g.: points or structures where slices are not fully closed)
Structures that are skipped will be denoted at the end of the DICOM import as shown in figure 8.
Importing an Existing Patient
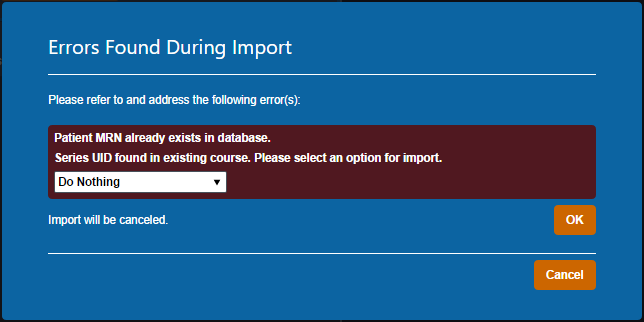
If the files you have selected to import coincide with the MRN of a patient that already exists in the database you will receive this error.
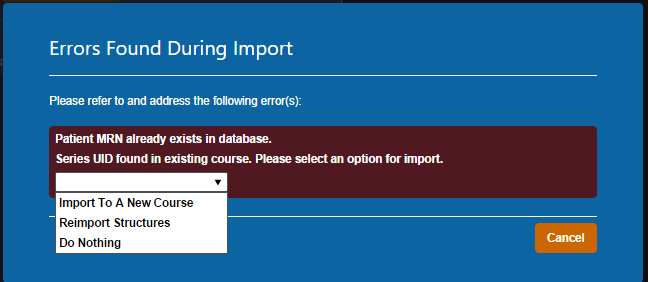 Fig. 9: Existing Patient Error
You have three options provided to resolve the error:
- Import to a New Course
- Re-Import Structures
- Do Nothing
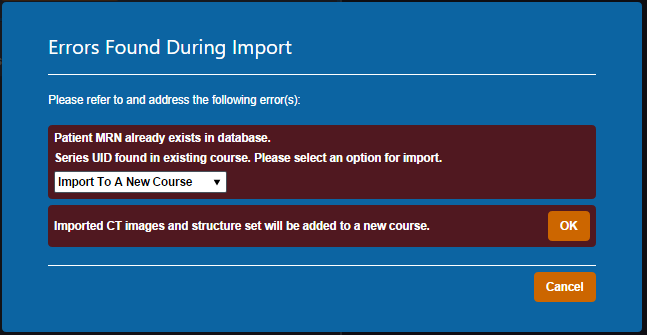
Import to a New Course
Importing to a new course will simply complete the import with the app creating a new course for this patient using the new imported files (note this option will not affect any existing courses or plans for the patient).
Re-import Structures
Re-Importing structures can be used if your goal is to update or add structures to an existing patient Course.
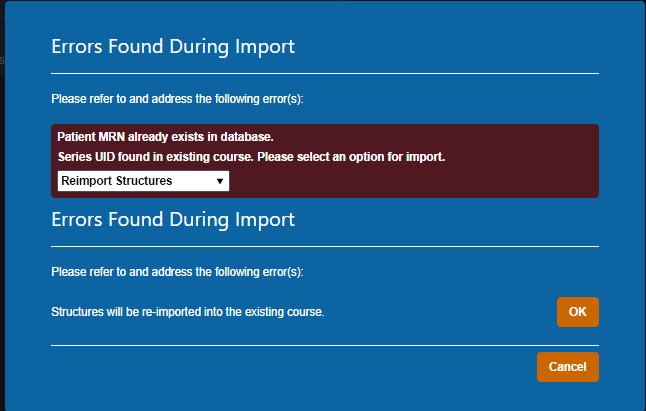
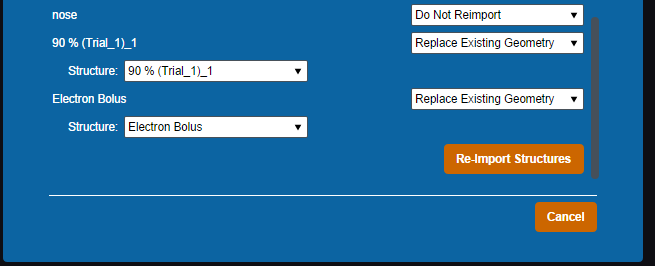
After selecting this option, you will be presented with a list of the structures in the import.
For each you may select one of three options:
- Do not Re-import: Skips this structure for the re import.
- Replace existing geometry: Replaces the existing structure in the current Course with the imported one.
- Import as new structure: Imports the structure to the Course as a new structure while not affecting the existing one and allows the user to specify a new name for the new structure. If the structure does not exist currently it creates it as normal.
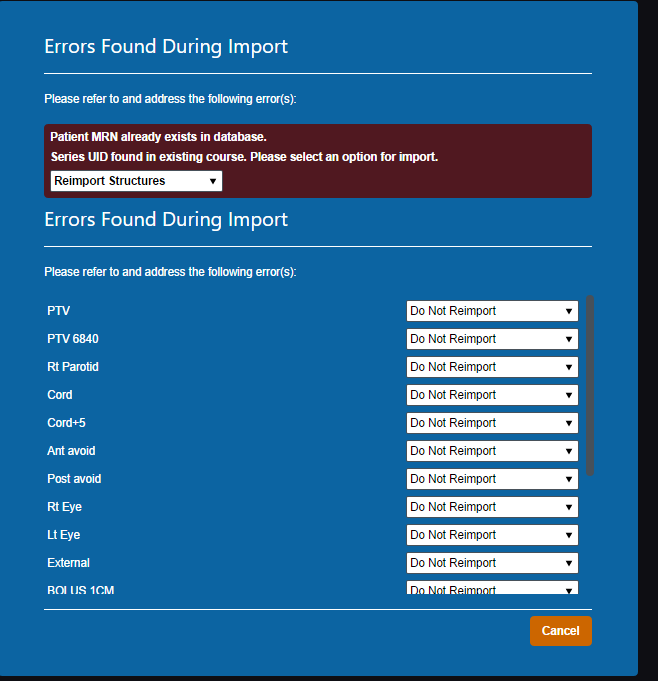 Fig. 12: Re-Importing Structure List
Once you have made your decision for each structure you must select “Re-Import Structures” to finalize your changes.